Share a hard drive with everyone on your Wi-Fi network
Take advantage of your router's USB port with a little trick that lets you share a hard drive with anyone on your Wi-Fi network.


- Webby Award ("How To, Explainer, and DIY Video"); Folio Changemaker Award, 2020
Cloud storage is expensive, but it's not the only way to share a bunch of files across many devices. Instead, you can use an external hard drive and your router to create networked storage accessible to anyone on your Wi-Fi network.
When it's set up, any files stored on that drive can be accessed by all devices on your network -- even phones and tablets. Here's how to set it up on Windows.
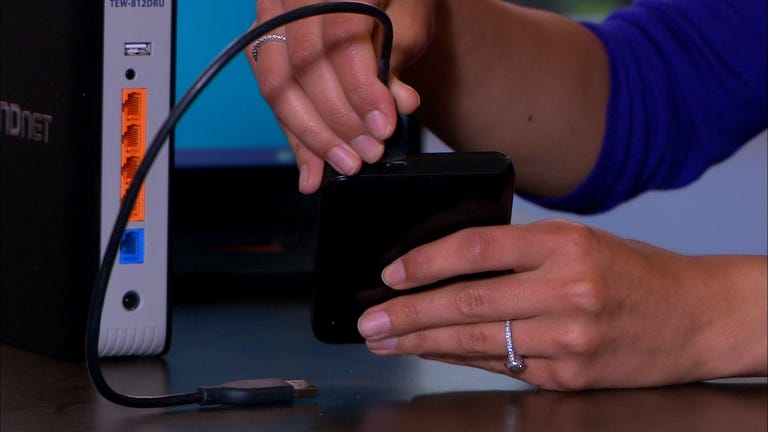
Step 1: Choose your drive
The drive you share can be as small as thumb drive, or as large as a 3TB external hard drive. Check your router's manual to find out if there are any storage limitations, since some routers have a storage cap.
Once you've chosen your drive, plug it in.
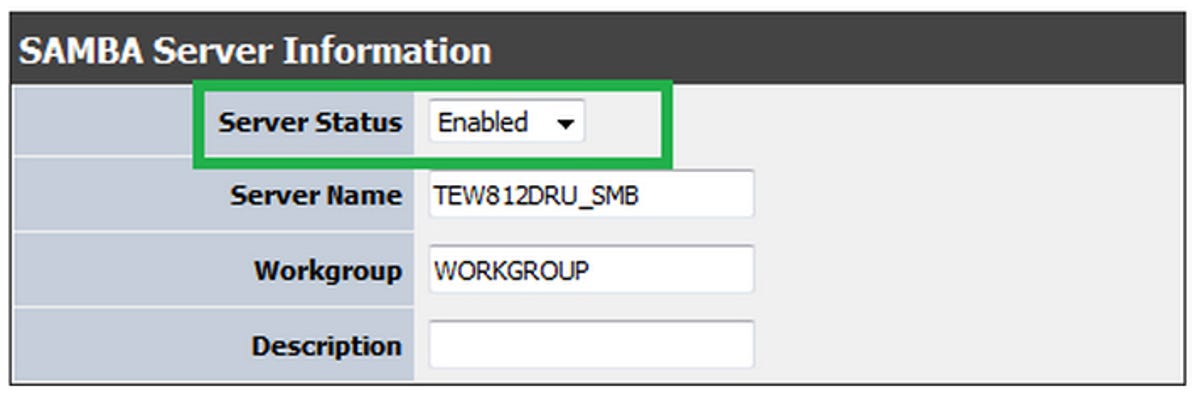
Step 2: Enable USB drive sharing
On any computer connected to your Wi-Fi network, launch a browser, and navigate to your router's IP address. You can find this on the back of the router, in the device manual, or by searching for it online. In most cases, it looks like 192.168.X.X.
When the page loads, you'll be asked to log in with your username and password. If you changed it, you should know it. If you didn't, it's probably still admin (username), and admin (password).
Those who fall into the latter category, please change your password as soon as you can, and before proceeding to the next step.
Every router's interface is different, but if yours has a USB port, you'll find a link entitled something like File Sharing under the Administrator settings. In this window, enable the file sharing server (also called SAMBA). Apply the settings, and exit.
Step 3: Access the drive
You're now ready to read and write to your attached hard drive. Open a file explorer window, and navigate to the Network folder in the left sidebar. Then, clear out the path at the top of the explorer window, and enter \\[your IP address]. So, for example, it might look like: \\192.168.1.1
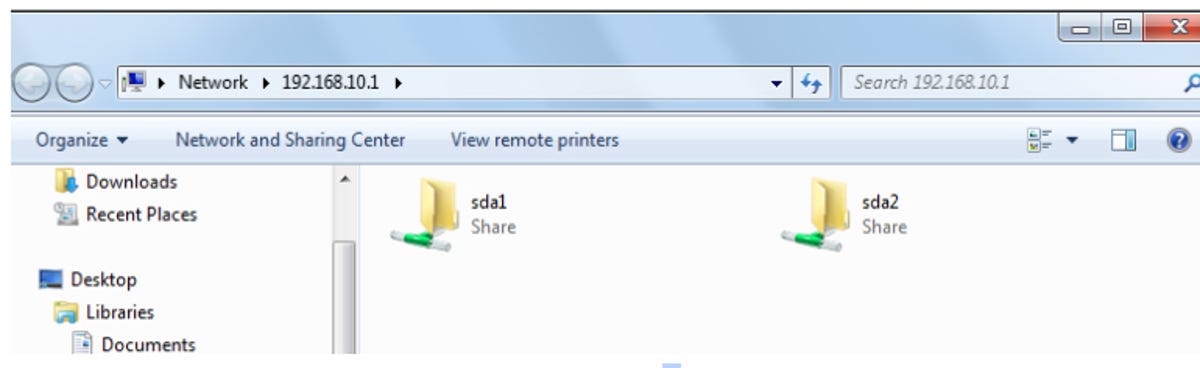
With that, your drive will appear. Open it to access its contents, just like any other folder. If you're asked to log in, simply use your router's login credentials (the same one used to log into the Web interface.)
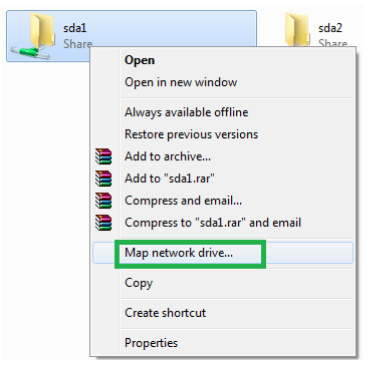
If you plan on leaving your hard drive attached, so that you can easily access it from any Explorer window. To do that, right-click the drive and select "Map network drive..." Give it a name, and the folder will appear in the sidebar.
To access the drive on other computers on the network, repeat step 3.